Ever wondered how you can transform the sun’s energy into power for your home? Deciding to get solar panels for your roof is the initial step in transforming the sun’s energy into power for your abode. You might be picturing yourself, with a tool belt around your waist, measuring tape in hand, marking locations, and planning out where those shiny rectangles will go. And be knowledgeable on how to install solar panels on roof.
The idea of installing solar panels may seem daunting at first. But don’t worry! With some basic knowledge about DIY installation and step-by-step guidance, it becomes as straightforward as any other weekend project.
This post promises value – from understanding the basics of how to install solar panels on the roof, gathering necessary tools like brackets drill or copper grounding wire, making connections using PV wire to testing the system professionally. And yes – there’ll be quick tips if you have metal roofs too!
Get ready to dive into an exciting adventure, all about tapping into the power of clean energy.
Table Of Contents:
- Understanding Solar Power and Its Benefits
- Assessing Your Roof for Solar Panel Installation
- Planning and Preparing for Solar Panel Installation
- Gathering the Necessary Tools and Equipment
- Installing Solar Panels on Your Roof
- Connecting and Testing Your Solar Panel System
- Maintaining and Monitoring Your Solar Panel System
- Comparing Different Types of Solar Panel Systems
- FAQs in Relation to How to Install Solar Panels on Roof
- Conclusion
Understanding Solar Power and Its Benefits
Solar power is a game changer.
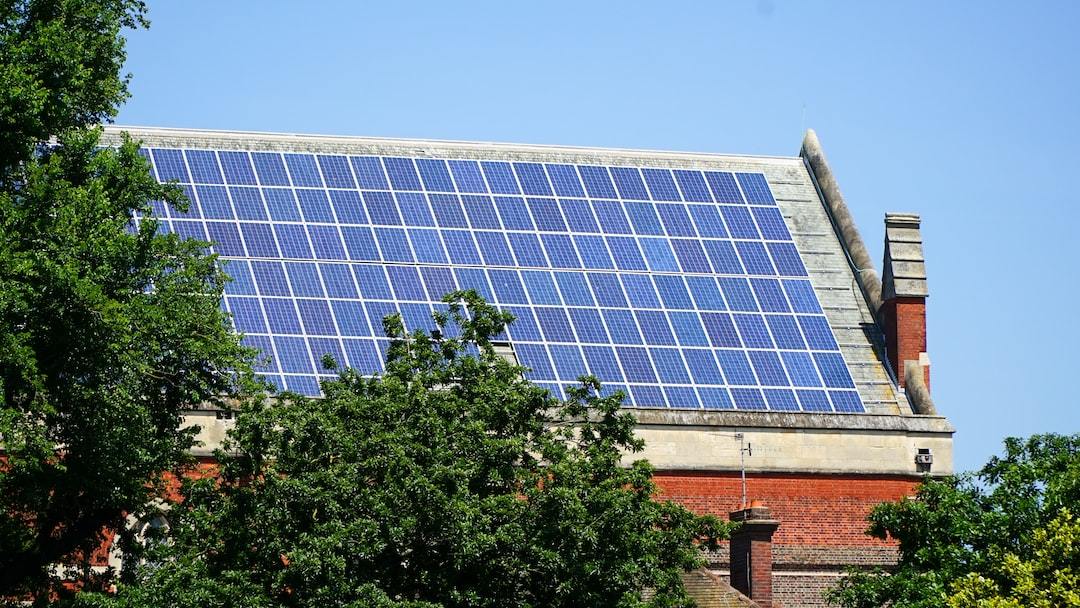
Solar panels, designed to capture this limitless supply of solar energy, are increasingly becoming popular among homeowners for several reasons. For starters, installing these can lead to low or no energy bills. Now that’s a relief.
Think about it – instead of continuously paying hefty sums every month for your electricity usage, why not tap into the free resource shining above us? The Sun never sends you an invoice.
Besides saving on expenses, there’s more good news. Having solar panels on your roof could increase your home value significantly. In fact, studies have shown that homes with solar installations sell faster than those without them.
If we compare traditional fossil fuels with renewable sources like solar power in terms of carbon footprint—well frankly speaking—it’s no competition. By choosing solar over fossil fuels you’re making an eco-friendly decision reducing greenhouse gases which ultimately contributes towards climate change mitigation.
The Easy Installation Process: A Cherry On Top
Contrary to what many think, solar panel installation isn’t as complicated as rocket science. All you need is some careful planning and basic tools such as a tape measure, chalk, or a tool belt (depending on whether you’re going DIY or hiring professionals).
In other words: Going green has never been so simple.
Apart From Savings And Environmental Impact…What Else?
Although the advantages of solar energy are plentiful, we have only begun to explore them. As a renewable energy source, solar is dependable and predictable (unless you live in an area where daylight is rare.). This means consistent electricity generation throughout the year.
Key Takeaway:
Embrace the power of the sun. Installing solar panels isn’t just a step towards lowering your energy bills, but it also boosts home value and contributes to climate change mitigation. And guess what? The installation process is easier than you think. Beyond savings and environmental impact, solar provides reliable electricity all year round without harming our planet – a true win-win.
Assessing Your Roof for Solar Panel Installation
If you’re considering a roof solar panel installation, the first step is assessing your roof’s condition. This involves checking if it’s flat or has shingles or metal roofs and determining its strength to support solar panels.
Importance of Location in Solar Panel Installation
The location of your house plays a crucial role in how efficiently your panels can harness the sun’s energy. If you live in the northern hemisphere, ideally, your roof should face true south for maximum sunlight exposure throughout the day.
You’ll also need to consider panel elevation angles based on where you are located geographically. The general guideline is to set the panels at a degree equivalent to your latitude. A professional roofing contractor can help with this assessment if needed.
To make sure everything goes smoothly during installation, mark locations where stanchions (the supports holding up each panel) will go before starting any work on installing them. Here’s more information about equipment required for DIY installations like the ones we’re discussing today.
Evaluating Roof Strength
Your roof must have enough structural integrity to handle additional weight from solar installation because some panels weigh quite heavy per square foot. Depending upon their size and type (thin-film modules are lighter than crystalline silicon ones), you might need extra reinforcement underneath existing rafters. Remember that having an experienced roofer check out things beforehand helps prevent costly mistakes later down the line when it comes time to do the actual install flashing around the base bracket attached top part middle rail hold place securely against elements.
Planning and Preparing for Solar Panel Installation
Taking the DIY route to install solar panels can be a rewarding challenge. Strictly adhering to instructions is key for a successful installation.
To start with, getting familiar with your local building regulations is crucial. Different areas have specific rules regarding requirements for solar panel installation. You might even score some incentives or rebates.
Understanding the Electrical Requirements for Solar Panel Installation
Your home’s electrical system plays a significant role in installing solar panels successfully. You must know about the key components like an electrical meter and sub-panel.
The electrical meter measures how much electricity your new solar power system produces while a sub-panel divides that electricity between different circuits in your house.
Make sure you’re prepared before starting on this journey of harnessing the sun’s energy to reduce those hefty electricity bills. Don’t worry though; if you ever feel stuck, professionals are always ready to lend their expertise.
Note: Always consult with a professional electrician when dealing with electrical systems during your DIY installation process.
Gathering the Necessary Tools and Equipment
Getting ready for a DIY solar panel installation means gathering all the right tools. A tape measure, of course, is essential. You’ll need it to mark locations accurately on your roof.
You’ll also want an impact driver in your tool belt. This powerful tool lets you install flashing beneath shingles without causing damage. Along with this, make sure to get steel bolts and mounting brackets that support solar panels firmly on any type of roof.
The drilling task isn’t complete without drill bits that can penetrate various materials including metal roofs if needed. But remember, using a good quality drill bit not only makes the job easier but also ensures a longer life for your equipment.
Choosing the Right Solar Inverter
A crucial part of any solar panel system is its inverter as it converts the sun’s energy into usable electricity for our homes or businesses. So picking out a reliable one should be on the top priority list when preparing for panel installation.
Your choice will depend largely on what kind of system you’re installing – off-grid systems require different inverters than grid-connected ones do because they operate differently by design. But don’t fret over details – just keep in mind that understanding how these devices work can help inform your selection process considerably.
Note: Assembling all necessary materials before starting saves time during actual project execution.
Remember, taking precautions while handling electrical equipment always pays off.
Please consult professional electricians for more detailed advice. You can also visit local hardware stores or check online marketplaces to get these tools.
Armed with the right equipment, you’ll be well-prepared to tackle this rewarding DIY project and enjoy lower electricity bills in no time.
Key Takeaway:
Get your DIY solar panel installation right by gathering essential tools like a tape measure, impact driver, steel bolts, and mounting brackets. Don’t forget quality drill bits for different roof materials. Choose the right solar inverter based on your system type – off-grid or grid-connected. With proper preparation and safety measures, you’re all set to enjoy lower electricity bills.
Installing Solar Panels on Your Roof
Laying out the locations for solar panel stanchions is your first move when you decide to harness the sun’s energy. This process requires careful planning, but don’t worry. Our expert guide can help.
Marking Locations
To maximize power output, panels should face south if you’re in the northern hemisphere. Use a tape measure and chalk to mark where each stanchion will go. Remember that precision is key here; even slight misalignments can reduce your system’s efficiency.
You’ll also want to make sure that there are no obstructions like trees or buildings blocking sunlight from hitting your roof solar panels directly throughout the day.
Installing Flashing Beneath Shingles
The next step involves installing flashing beneath shingles – this helps prevent leaks by creating an extra layer of protection against water damage. But it’s not as hard as it sounds. It simply involves lifting up shingles gently with a pry bar and sliding thin metal strips underneath them at marked spots where mounting brackets will be installed later on.
Affixing Rails to Stanchions & Fixing Inverters Underneath Each Panel
Rails support solar panels while inverters convert generated DC power into AC which we use in our homes every day. Securely affix rails onto stanchions using stainless steel bolts before moving on to attaching inverters under each panel – this placement ensures easy plug connections between panels and home electrical systems.
Wiring Up The System
Lastly, use PV wire to connect the solar panels and a copper grounding wire for safety. You might want to hire a professional electrician for this step – we all know that messing with electricity can be dangerous.
By following these steps, you’ll have your roof solar panel installation up and running in no time.
Key Takeaway:
Keen to tap into solar power? Begin with a meticulous plan, marking the exact spots for your solar panel stanchions – accuracy matters. Make sure nothing’s blocking the sun. Slip flashing under shingles to guard against water harm, then attach rails onto stanchions and inverters beneath each panel. Wire it all up using PV wire, but think about getting
Connecting and Testing Your Solar Panel System
Once you’ve installed your solar panels, it’s time to link them up with the electrical grid in your home. Don’t be daunted, we’ll assist you through the process.
The primary necessity is a consumer unit, which serves as the main control hub for your solar energy setup. It takes in all the electricity produced by your panels and sends it where needed around the house.
You also need a PV wire that connects each panel together into an array before heading toward the consumer unit. Make sure you have enough wire on hand before starting this process.
Hiring a Professional Electrician
If working with electrical systems isn’t something you’re comfortable doing yourself, hire a professional electrician for this step. They’ll know exactly how everything should be wired up safely and efficiently while following local building codes.
Making Sure Everything Works
Last but not least comes testing. After connecting everything correctly, turn on each panel one at a time while keeping an eye on the power output from your consumer unit. Electrical Safety First provides great resources about the safe handling of electrical appliances during the testing phase.
Maintaining and Monitoring Your Solar Panel System
Keeping your solar panel system in top shape is key to maximizing its power output. Regular maintenance helps ensure long-term efficiency, but how do you go about it?
Cleaning Panels for Optimal Performance
Dirt and debris can limit the amount of sun’s energy reaching your panels. So, a simple rinse with a garden hose every few months could help boost performance.
However, be cautious not to use cold water on hot panels as this might cause damage. If they’re too high or steeply pitched, consider hiring professionals to avoid any risk.
Monitoring System Output
Your system should include a monitoring feature that allows you to track the electricity generated by your roof solar panels. Monitoring system output will help identify potential issues, allowing you to address any discrepancies in power output promptly.
If there are significant drops in power output without obvious reasons like cloudy weather or snow coverings, then it’s time for some troubleshooting.
Troubleshooting Issues With Power Output
Possible causes of reduced power output could range from damaged equipment (like inverters) to tree shadows falling over the panels at certain times of day. You may need professional assistance here because finding and fixing issues involves more than just cleaning dirty glass.
Do you have solar panels? Keep ’em shining bright. A rinse every few months can boost performance. Monitor output, fix issues fast, and watch your energy bills shrink. DIY power at its finest. #SolarEnergy ️ Click to Tweet
Comparing Different Types of Solar Panel Systems
No single solar panel system is suitable for all needs; instead, they come in various sizes and shapes to fit specific requirements. Just like houses, they come in various shapes and sizes to suit your needs. In this part, we’ll delve deeper into the different sorts of solar panel systems out there.
Monocrystalline Solar Panels
The granddaddy of them all is the Monocrystalline solar panels. They’re known for their high efficiency and sleek design due to their single-crystal structure source. But hold on to your tool belt because these bad boys can be quite pricey.
Polycrystalline Solar Panels
If you want something more affordable but still reliable, then Polycrystalline solar panels might just fit into your budget. Their blueish hue comes from multiple crystals in each cell which makes it less efficient than its monocrystalline counterpart.
Thin-Film: Amorphous Silicon Solar Panels
Moving onto Thin-Film technology – specifically amorphous silicon (a-Si) solar panels. These are easy on the wallet and have an excellent low-light performance but watch out for their large square foot requirement. Not ideal if space is limited.
To put things into perspective, let’s think about it as buying shoes; while some prefer leather boots (high cost-high quality), others may opt for running shoes (mid-cost-good quality). However, there’s always room for flip-flops (low-cost-decent quality).
Each type has its own advantages and disadvantages. It’s crucial to understand what works best for you before making a decision. Just remember, like all things, DIY solar panel related, don’t forget to ask a professional electrician for help when needed.
FAQs in Relation to How to Install Solar Panels on Roof
Can you put solar panels on your own roof?
Absolutely, but remember to check local regulations and consider hiring a professional if it seems too complex.
How do they attach solar panels to the roof?
Solar installers use sturdy brackets or mounts attached directly to the rafters. The panel frames are then secured onto these mounts.
Why not put solar panels on the roof?
Rooftop installations aren’t for everyone – shade, poor orientation or structural issues could make them less efficient than ground-based setups.
Conclusion
Installing solar panels on your roof? Not as daunting as it seems. This guide walked you through the basics, from understanding the power of solar energy to assessing your own roof’s suitability for panel installation.
The DIY spirit shone brightly here – gathering necessary tools, marking locations, and setting up mounting brackets were all within reach. You even learned how to connect and test the system professionally!
Metal roofs or otherwise, remember: preparation is key in this adventure into clean energy. The sun’s power awaits right above you! Keep harnessing its potential; keep reducing those electricity bills; keep boosting home value with each sunrise.
This isn’t just about knowing how to install solar panels on the roof. It’s about empowering yourself towards a sustainable future, one square foot at a time.


